Happy 2026 to you all...

Happy New Year... So that's 2025 done with. In all, not a bad year, both personally and professionally. Plenty of varied work both in the UK and abroad. Lots of van travel and tips away to Europe and Asia, a place I am still in as I write this. I will be in Asia until the beginning of March, back to some work to keep some pennies rolling in.
Highlights for 2026...? Nothing that stands out yet. Work-wise, there is something every much, not too much, not too little, just enough to keep things rolling along. There are a few non-work trips in the pipeline.
2026 is looking like it could be another good year. All I can do is keep my fingers crossed. In th emean time, I'd like to wish you a fabulous 2026. Lots of health, wealth and happiness.
Not a bad year in all...
Work in 2025 has been pretty good, a busy year really, but, still managed to get some good travel in. Not bad. My thing these days is to get a good work-life balance in. I've had it with chasing work.
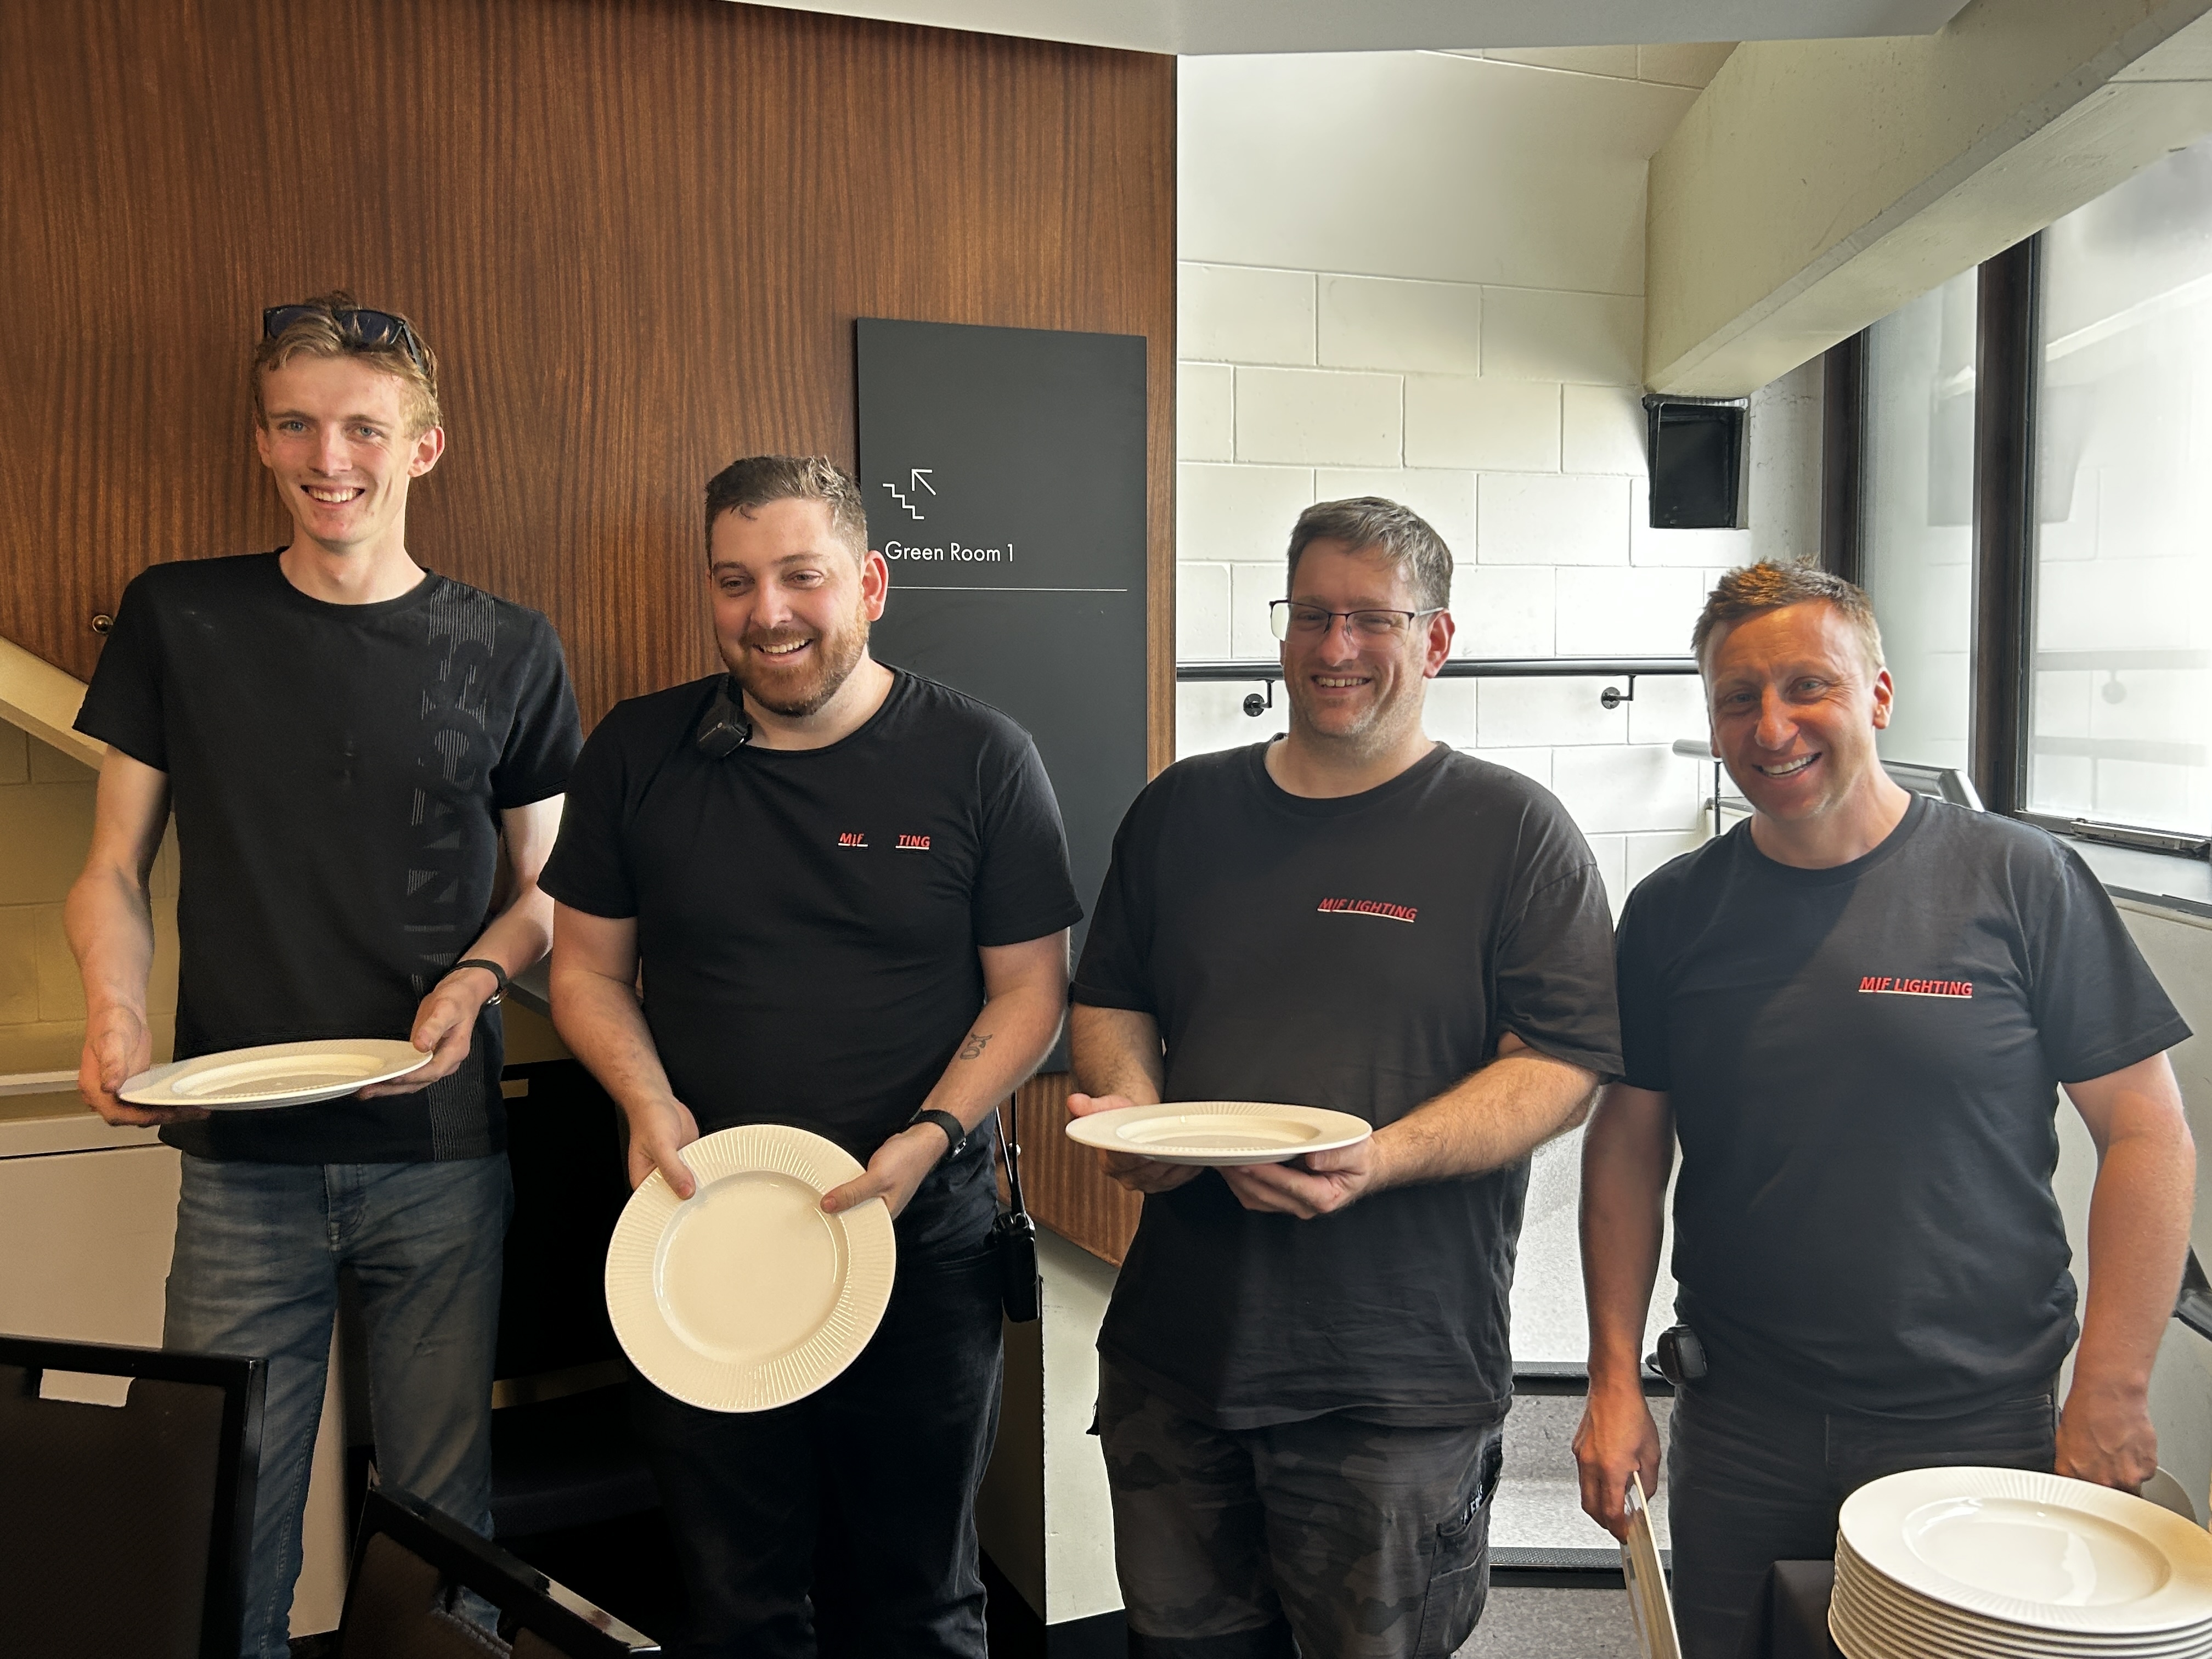
Did a nice little tour in Oz and NZ with this bunch of lovely people though, just as the year closed.

This is the Oz crew who were fabulous.... Thanks gang...
However.... Get this lot... This was the fantastic lighting crew from NZ.
Merry Christmas and here's to a fabulous 2026
Del x
What to see at the side of stage
Standing stage right, looking across the other side, I was caught by a Perseo on the floor. Nice.

How do you provide redundancy for your Vista?
"It's all gone black... Aghhh!"
My current lighting desk is a Vista by ChromaQ. I have two surfaces, the MV and an EX. With all the other bits like a good screen and all the cables, etc, to make it work, it goes into a Peli case that weighs 26kgs, Ideal for flights. Indeed, this set-up has been all over the world on all kinds of gigs and it has never, but I mean, never let me down..!
Despite the reliability of my system, it's always in the back of my mind that I don't have any kind of backup. I have the potential for surface failure or laptop failure, or worse, both! This is no different, of course, from any all-in-one lighting desk; in fact, an all-in-one system is very vulnerable in the event of failure. But let's be honest, the reliability of all these systems, whether it's all in one box or separate computer or surface, is very good today, and no, I don't want to get into a desk-bashing forum here...!
Sure, I can have another laptop on the same network as the spare console and the rig silently tracking, and just move the dongle between the two laptops, but I'm so scared that I will lose the dongle, which the Vista system uses, and to replace my 4098 channel dongle would be too much of a hard, and embarresing pill to swallow. Believe me, I know, I've lost one before, many years ago!!! Doh!
So what options are there for some kind of backup?
Options. What are they?
1. Buy another surface and a second dongle. Obvs!
Lots of expensive kit to cart about. But this might work for you in your case, or in a fixed rig environment.
Pros: The best and most reliable way of having a tracking backup. The "real" way to do it. Cons: Expensive. Needs another Peli case and more space. So now I'm dragging two desks around!
2. Buy just another dongle.
Not as expensive as the first option. Two laptops in the same network, each with a dongle, but those dongles are still pricy!
Pros: Gives a reliable and stable tracking backup. Cons: No surface, so if your show is complicated and requires a lot of button and fader work, then it might be fiddly playing back on a laptop, plus if you have a two-screen layout, you will find that the backup laptop will gather all of the Vista windows into one screen, unless you have a backup screen as well, so will require a bit shuffling about to get to where you want be.
3. Use a KVM switch or just a USB A B switch.
This keeps your system in place, a surface, a screen and two laptops, a main and a backup laptop again in the same network.
Pros: Cheap... Requires just a tiny investment in a USB A B switch. It works! Cons: Don't buy a cheap switch; buy the best you can get. How your system is built may require a bit of replugging. It means that the dongle is out and about. There might be a bit of delay while the hardware detects the licence and completes the handshake with the dongle, etc, and you could hit a Vista "no dongle inserted" thing!
4. Install a lighting cue recorder.
This is a small box that listens to Ethernet/DMX on the network and triggers a cue or sequence when there is no Ethernet from the desk.
Pros: Gets the lights up on stage with no replugging anywhere. Space footprint is small. You can play a single static cue or a full sequence that you grab from your desk. Cheaper than a second dongle. Keeps the dongle in the hardware. Nice and safe, for me anyway! Cons: There is NO tracking, there is no second laptop, so choose your triggered cue or sequence carefully!
Believe me, I have looked and tried all of the above options.
If I'm on a tour, or a biggish gig in my home territory. I'll get production to provide a full backup, surface, dongle, laptop and screen. A full mirrored setup. The issue I have is that any size of show overseas is that not everyone has or can get a Vista system; I'm on my own. Small gigs/lighting providers don't have Ethernet; they are still on copper, yes, they do still exist! My system is just right as it is for what I do, so I need to find a simple, reliable, no-fuss way of getting lights up! As I've said, I don't like having the dongle out of the surface, especially on load-ins and outs, "shit, where's the dongle...?" I never want to have to say that.
Option 1. I really can't afford it! The money, the space and the weight. I'm just a sole trader who does lights and has my own desk. But where I can, I get production to replicate mine
Option 2. The dongle price for existing users, etc, is still too expensive, which I get. Maybe a different licensing system is now required? I use Capture, and the licensing system there is quite nice.
Option 3. I will lose the dongle, whether it's a switch or just hot-swapping the dongle between computers.
Option 4. This is my current chosen way of "...shit! Quick get some lights up..." solution. There are a couple of DMX recorders, but I favoured the Enttec S Play Lite. It is a tiny box, so easy to store and move around. It will store single static cues, which is good enough, but it will also store full sequences. 16 universes of ArtNET or streaming with 2 physical DMX outputs.
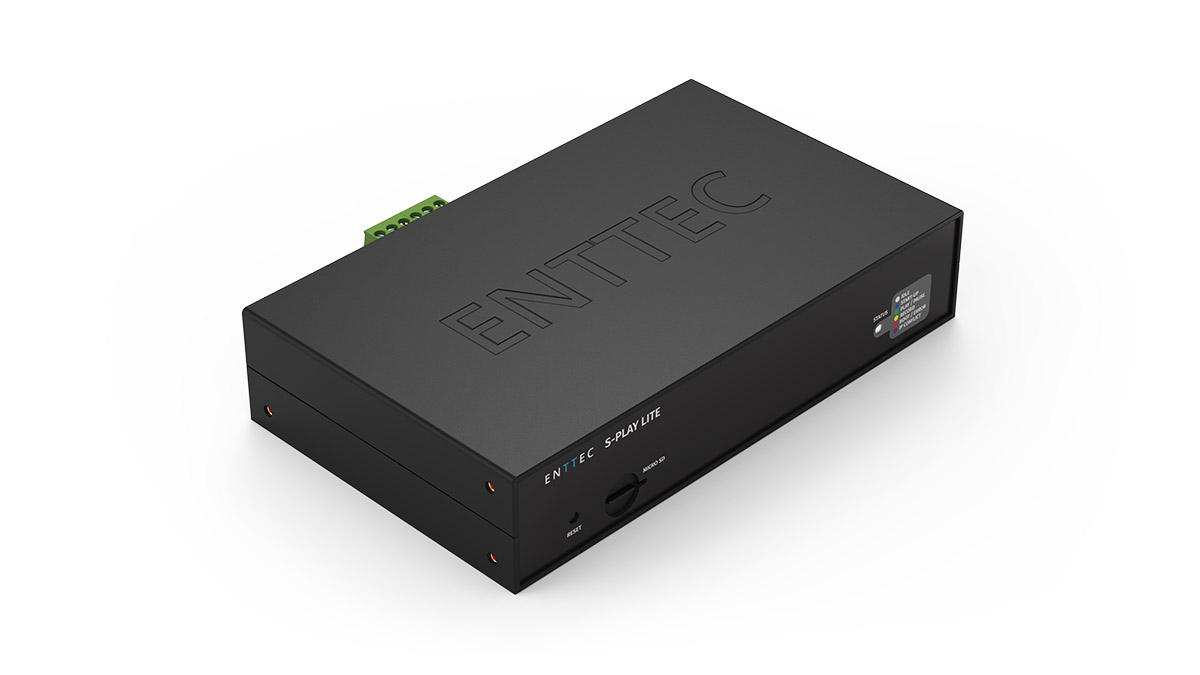
The tiny Enttec S-Play Lite
However... Do we really need a backup nowadays?
If you go to, or do gigs these days, you will not see kit 'backed up'. I've never seen a spare FOH sound desk, monitor desk or VT mixer. Sure, they may have a UPS's etc, but that's to protect against a power outage; but if the amps go off or the lights lose power, all the UPS is doing is keeping the control end active until the amps, etc, come back on, the lights have reset, and the LED screens have powered up. However, I have been to gigs and seen spare lighting desks. Why's that? We have all seen it and done it, 2 GMAs, a pair of Hogs, etc. Curious.
A laypersons guide to SSH security
How to secure your SSH connections
A simple layperson… yes, that’s me, I'm afraid. I’m not a coder, or a network wizard, or an expert scripter. I'm a hobbyist who enjoys tinkering with computers. I’m just a guy who hosts his own stuff from home using a tool that makes that journey so easy. The tool I use is Yunohost. They have put together a nice system that, for people like me, is easy to deploy, use and maintain. They have an excellent catalogue of applications, which are all packaged for use on their platform. This means that the security of the apps is already taken into account, allowing you to install with peace of mind. There are other systems around that do similar, but I have found the Yunohost system to be the better one (FWIW). I make a monthly contribution because it's worth it. You can see my system and what's in it here.
That's the advert done with, now to the reason for this article.
Despite the excellent YNH offer, the excellent catalogue of apps, and ease of use, sometimes you do have to get your hands dirty, and when I say that, I mean using a terminal application and something called SSH to log in to your system and do admin 'stuff' or even more terrifying, fixes... Gulp!
What does SSH mean?
It means Secure SHell (or Secure Socket Shell). It is a collection of utilities that provides encryption, key authentication and strong passwords. SSH is used by us users (admins) to manage our systems and applications remotely, enabling us to log in over a network, remotely or locally, to execute commands and to fix and add things, move files from one place to another, and so on. It's a bit more technical than that, obviously, but that's the basics of it.
Something you should probably do first... Maybe. If you want. I would!
Once you have successfully installed and tested your new Yunohsot system, change the SSH port number. SSH is one of the most scanned ports used by hackers to get into your system. The default port is 22, so change it to something else; anything above 1024 should do the trick. So, using terminal and log in to your system with:
ssh username@123.123.123.123 (the username you used to install YNH, the numbers are your server's IP address).
Hit return and enter your password; this is the one you set when you installed YNH in the first place.
Now type in, or copy:
yunohost settings set security.ssh.ssh_port -v 1234
The 1234 should be your chosen port number above 1024 that you want to use. If you really fancy getting your hands really dirty, you could do the following in terminal:
sudo nano /etc/ssh/sshd_config
This will open up a Linux editor called Nano, and you will have the SSH configuration file in front of you. Scroll down to the line that says #port 22. Delete the hash symbol (the comment) and enter a new port number so it will now say port 1234, the number of the port that you want to use. This method will require a restart of the SSH service, which you can do in the YNH GUI under Services, or while you are here in terminal type:
sudo systemctl restart ssh
However, if you want to keep things nice and simple, use the command yunohost settings set security.ssh.ssh_port -v 1234, which will keep things in order for you.
Some folk will probably say don't bother changing the port number if SSH is not forwarded on your router to your server, but whatever, I'd change it. You do have to remember the port number, though, when entering some commands that require SSH access, like logging in using terminal in the future. You will need to enter the port number prefixed with a -p. We shall see that later.
So once you have changed your port number and restarted the SSH service, instead of logging in with:
ssh username@123.123.123.123, you will now need, ssh -p1234 username@123.123.123.123
To be or not to be...
Ask yourself this question. Do I want to access my system via SSH inside my local network, outside or both? Don't be afraid to access your system outside of your network; you just have to think about a few extra things to stay secure.
Here is a little cut-out and keep table of your options and what you should consider.
| ACCESS | PORT FORWARDING | ADVANTAGE | DISADVANTAGE |
| Internal only | Not required | Your SSH port won't be found when scanned by hackers. | If you are away and need to fix something, you can't. Sorry. |
| External Only | Required | You can do some work on your server. Excellent. | Your SSH port number (22) is exposed. Good job, you changed it! |
Personally, I want both. So I have a Raspberry Pi with a VPN server installed on it. Many places on the internet tell you how to install a vpn on a Pi and how to include it in your network. Once you have installed the vpn server, you only need a vpn client on your device(s). I use WireGuard on all my devices. If I need to do anything, I just fire up Wireguard, make the connection and open a terminal app and log in using my username and password. Everything appears to me as local, as if I am in my living room or kitchen with a cup of tea by using: ssh -p1234 username@123.123.123.123 (Yes, I changed my port number, so I need to remember the -p switch and use -p1234.
Can I be even more secure?
So far, we have been using SSH using a username and password for authentication, whether we are local or remote. (IP address when local, domain names when we are remote, unless you are using a vpn, then it's local.) There is another level of security I have recently tried called Key Authentication. This is a process of generating encrypted public and private keys, one on the server and one on a device that you will use to access your server. When you attempt to log in, if the keys match, you get in; if they don't match, you can't. If you lose your device or it gets corrupted, then you are effectively locked out of your server, but there are backdoor ways to get back in and reset. You'll need a monitor and keyboard connected to your server. More on that later.
So let's assume that for this example, we want to access our server, called myserver.com, remotely. We have changed the default port number for SSH from 22 to 1234. We have configured our modem's firewall to port forward SSH 1234 to our server's IP address. When we open a terminal in the coffee shop down the road and type:
ssh -p1234 username@myserver.com
Followed by the password. We now have our server in front of us, and we can do some stuff. But what happens if we are snooped on, wifi sniffed, our credentials compromised or found, whatever...? We can set up our device or devices to use an authentication key so that only those devices can access the server. Let's just do one device for now, a MacBook Pro 16.
Open up a terminal session on your MacBook Pro 16 (other computer manufacturers and models are available!) and type the following:
ssh-keygen -t ed25519 -C device_name Here the device name will be macbook16 so:
ssh-keygen -t ed25519 -C macbook16
When you hit enter, you will be given a path name to save to. Accept it as it is, just hit return. You will then be asked for a passphrase, which is just another word for a password. You could just not bother and hit return, but I'd advise you to set one. Make it a good one, a long one, so long you need a password manager app to remember it. Again, some may say you don't need it, but what if someone gets a hold of your device? You will be asked to confirm the passphrase.
Your device will now create two keys, a private one and a public one. We need to copy the public keys to our home server with:
ssh-copy-id -i ~/.ssh/id_ed25519.pub username@myserver.com
Hit return. Oh no, you got a connection error. Hmmm. This command assumes that you are using port 22 for SSH, but we have changed it to 1234. Remember that little -p switch? So now type:
ssh-copy-id -i -p1234 ~/.ssh/id_ed25519.pub username@myserver.com
That's it. Done. Close all your terminal sessions, and log in using,
ssh -p1234 username@myserver.com
Now you will be asked for your passphrase and not your password. Enter your passphrase. If you get the server prompt, then the key authorisation for your MacBook Pro 16 to your server works. You still have the old method of logging in using your username and password. We can turn that off so that you can only use key authentication on your MacBook Pro. To turn this off, again, whilst in terminal type:
sudo nano /etc/ssh/sshd_config
You will have probably been here before if you chose to change your SSH port using Nano, the Linux text editor. Scroll down the open file and find the lines:
PasswordAuthentication yes and edit this line by changing the yes to a... no, so now it will read:
PasswordAuthentication no
Also, change the line:
PermitRootLogin yes to no
Save the file and exit. Again, you will have to restart the SSH service through the web GUI, or while you are in terminal type:
sudo systemctl restart ssh
You are all done. Access to your server at home can only be done with your MacBook, remotely. However, can you see the problem here? Your MacBook craps out, breaks down, gets stolen, whatever... You can no longer access your server. You have turned off the username/password method of getting access in favour of key authentication. What do you do?
If you want to use key authentication only, then just repeat the above steps on other devices, iPhone, iPads, Android, and just change the "device name" to the device name you are adding. You can use one key for all, but don't, just don't do it. Create a key for each device. It's safer and easier. You will be able to get access if you lose one device by using another.
Help...! I can't log in. My server is 'bricked"
So you have lost all your devices, or the key authentication process is just not authenticating anymore. How do we get access to our server and reset back to logging in using a username and password? This is where, when you get back home, you get the keyboard and monitor out. Plug them in and log in as admin locally, and let's turn back on password authentication with:
sudo nano /etc/ssh/sshd_config and change the lines:
PasswordAuthentication yes
PasswordAuthentication yes
Restart the SSH service with:
sudo systemctl restart ssh
Now you can reset or recopy your keys from your device as we did above. Of course, if you are using a VPS, then you will have to use the provider's console to do the above.
Basic Security Tips
These are not in any order or preference, so take your pick of either or a combination of:
- The easiest one is to use SSH locally only, take the port off your router, so no port forwarding.
- Change the port number for SSH.
- Recycle passwords every few months.
- Use key authentication on more than one device.
- Keep your admin group small.
- Use a VPN on a Pi to log in remotely.
There are probably more things you can do, like check that Fail2ban is working and so on.
I told you that this was a layman's guide, so I might have got one or two things wrong. Please let me know. I'm trying to make this easy for those of us who have had difficulty understanding and securing SSH and using Key Authentication.
There is, however, excellent documentation on SSH and key authentication at the Yunohost website, which, of course, should be the definitive guide rather than my 'Janet & John", ABC version. I only write from experience, trial and error.
dj
Instagram or Pixelfed?
After using both, which one do I prefer?

Instagram: Probably the world's most popular photo-sharing platform?
When Instagram came on the scene back in late 2010, I was a big user of the platform as an amateur photographer. I didn't boast a huge following, but the community was great to get involved with. It was easy to find like-minded people and to share your photos, get comments, good and bad, share techniques and so on. The community was large, so it was easy to connect with people; you could get your followers up, which meant more exposure, and the likes soon followed. It was a good place to be as a photographer, amateur or professional, and I was a constant uploader of pictures from my phone and my camera; it was, I hate to say it, addictive sometimes.
As time went on, of course, the tone changed on Instagram, and my enthusiasm shifted. I can't quite put my finger on what or how it changed at the time; it just did. It started to feel like another place, comments started to get "funny", which soon turned into "nasty". People would barge in on your feed with comments not related to the content. Then the ads came, then came Meta, and in my view, they destroyed what Instagram set out to do, and Instagram just became a mini Facebook.
Facebook, never and still don't understand it. Why?
I drifted around other platforms like 500px and Flickr. I'd had an account with both for years. I know these things cost money to put up, but I felt the ever-increasing cost was becoming too much for both 500px and Flickr. Yes, I wanted it cheaper or free!

PixelFed, probably the best behaved photo sharing platform?
As an open source junky, I discovered PixelFed. It was in its infancy but looked promising. Very Instagramish in its presentation and use, but it was decentralised, with better privacy controls, and it felt like a 'proper community', just a bunch of people putting up their work and others liking it and or commenting. It was a small community; it was new after all. I was curious about the whole federated idea or PixelFed, multiple private servers all connected, decentralised and so on, a very interesting concept, so I gave it some time and started posting. It was slow and not very... vibrant. Give it time, Del...
Fast forward a few years, and recently I created a new Instagram account, after binning off my account years ago. I hate it... Sorry, but I do. I found it just full of junk and difficult to connect with. Maybe I've got older, maybe I'm not using it right, maybe it's just not for me, the ads, the constant life hacks, the shouting, the constant '...I'm here, look at me...' feel. Maybe I just need re-educating. It's just a loud, noisy place.
At the same time that I recreated my Instagram account, I dipped back into my PixelFed account, and found that it had changed, but it had changed a lot, it was quicker, stable and the community base had grown, so I started by posting some old photos first, just to see how it went, and to my surprise, it felt like a new home. That sounds a bit crass, I know, but it just felt... nice... Lots of people are showing some fantastic work with a phone or a camera, no noise, no shouting, no ads, just people liking and commenting on other people's pictures, with a good helping of privacy control. A bit like... Instagram was back in 2010! It's all about the data...
Today I'm using PixelFed. I like the style, the feel and the community. Sure, you still get the odd bozzo, but that will always happen. I like PixelFed, and it has, for the moment, become my go-to photo-sharing platform. I like the control, the privacy and the true community spirit of the platform. Long may it thrive
Money, money, money....
It's free...! While I have already bemoaned the cost of the likes of 500px, Flickr and others, it's not just the financial cost. It's your data and privacy cost. If you're going to put photos out on the internet, then you are not being very private in the first place, but at least you can control how your data is analysed and distributed. I do contribute some money to open source apps, it might be small, but it's a contribution, something we should all consider doing once in a while. Again, it doesn't have to be much.
A BIG SHOUT OUT!!!!
To the folks who make PixelFed and other good open source software available to us all. Thank you!